Connect Your Wallet to SNFT Testnet
Step-by-step guide to connecting your wallet to the SNFT testnet network.
Setting Up MetaMask for SNFT Testnet
This tutorial will guide you through the process of adding the SNFT testnet network to your Met aMask wallet and connecting to it.
Step 1: Install MetaMask
If you haven't already, install the MetaMask extension for your browser from the official website.
Step 2: Open MetaMask and Access Network Settings
Click on the MetaMask icon in your browser, then click on the network dropdown at the top of the popup. Scroll down and click on "Add network".
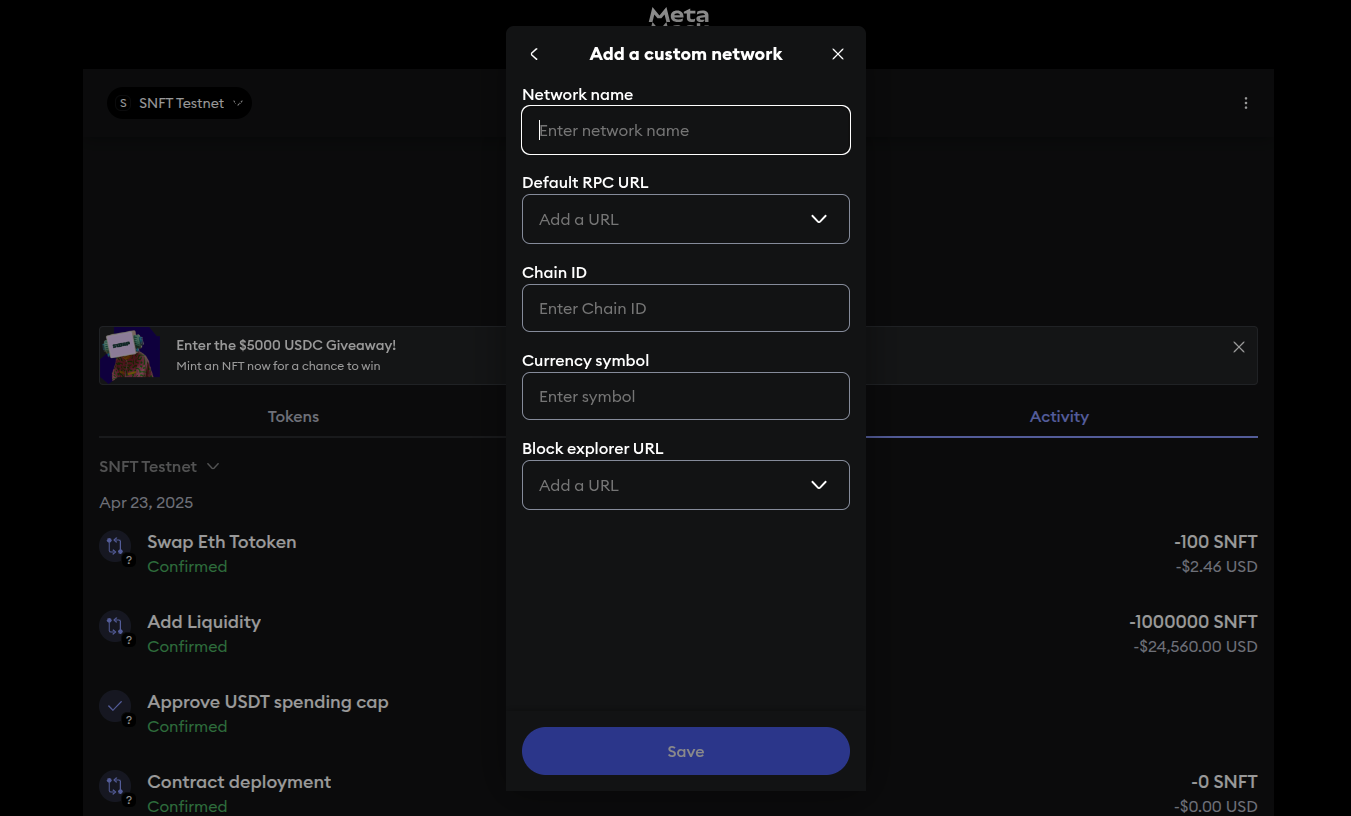
Step 3: Add SNFT Testnet Manually
Click on "Add a network manually" and fill in the following details:
| Network Name | SNFT testnet |
| New RPC URL | https://trpc.snft.in |
| Chain ID | 98889 |
| Currency Symbol | SNFT |
| Block Explorer URL | https://texplorer.snft.in |
Click "Save" to add the network to your MetaMask.
Step 4: Switch to SNFT Testnet
After adding the network, select "SNFT testnet" from the network dropdown to connect to it.
Step 5: Get Test Tokens
To interact with the SNFT testnet, you'll need some test tokens. Visit the SNFT faucet
to request test tokens.
Verifying Your Connection
To verify that you're connected to the SNFT testnet:
- Check that the network name in MetaMask shows "SNFT testnet"
- Visit the block explorer and ensure you can see your wallet address and transactions